How to Set up Memberships
Marketplacekit offers a variety of Addons for free. The addons Marketplacekit offers include User verification, Sitemap, HTML & CSS Editor, Listing Fees, Memberships, etc.
Memberships provide individuals & businesses with the option to post listings by subscribing to a plan. The marketplace owner can add their plans. Along with plans, they can also create coupons for the customers.
To enable Memberships, first, log in to your website’s panel. You can access your site’s panel in two ways.
-
Click on the wrench icon on the navbar.

-
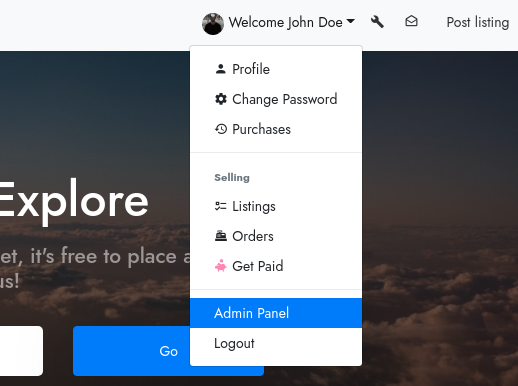
Click on your name and from the dropdown, click on “Admin Panel”.


You will now be redirected to the site’s admin panel. There, click on “Addons” on the side panel.

You will be redirected to the add-ons page. You can see a bunch of pre-installed add-ons there. Now, find the “Memberships” add-on and click on its “Settings”.
Note: Check if the toggle icon on before clicking on “Settings”

You will be redirected to the Stripe page where you can now add your Stripe API keys before you’re able to create memberships.
You can get your API keys from your Stripe dashboard https://dashboard.stripe.com/dashboard and the Client ID from the Stripe Settings https://dashboard.stripe.com/account/applications/settings

Once you’ve entered all the API keys and the Client ID, click on “Submit” and you’ll be prompted that your Stripe credentials are now successfully saved.

Click on “Memberships” that you can see on the screenshot above and you’re redirected to the memberships panel where you can add different membership plans.

Since we’ve not added any plan yet, you will see a blank page. Click on “Add a plan” to add a new plan.

Now, give the plan a nickname and a title and set the status to “Enabled”. Under “Description”, add a short description of the plan. Set the sort order (where you want it to appear).
Now, up to the limits and restrictions, you can limit the number of listings/month, featured listings/month, priority listings/month and the number of messages that the user can send/month.
Besides these, you can also set when to bill the user; monthly/yearly under “Interval”. You can also see a text box there, where you can add additional features/descriptions point-wise, separated by an “Enter”. And finally, you can also set trial period days. This allows you to not bill the user until their trial period is over. But, this is optional.
Once all this is set up, click on “Submit” and now, you can see the newly added membership plan on your site on yoursite.com/memberships.

You can also add other membership plans accordingly with different prices and different settings.

Besides adding Membership plans, you can also add “Free Member limits” and “Coupons” with this add-on.
